






Calmer Vet Trips for UK Cats: Charity and Vet Carrier Training Steps
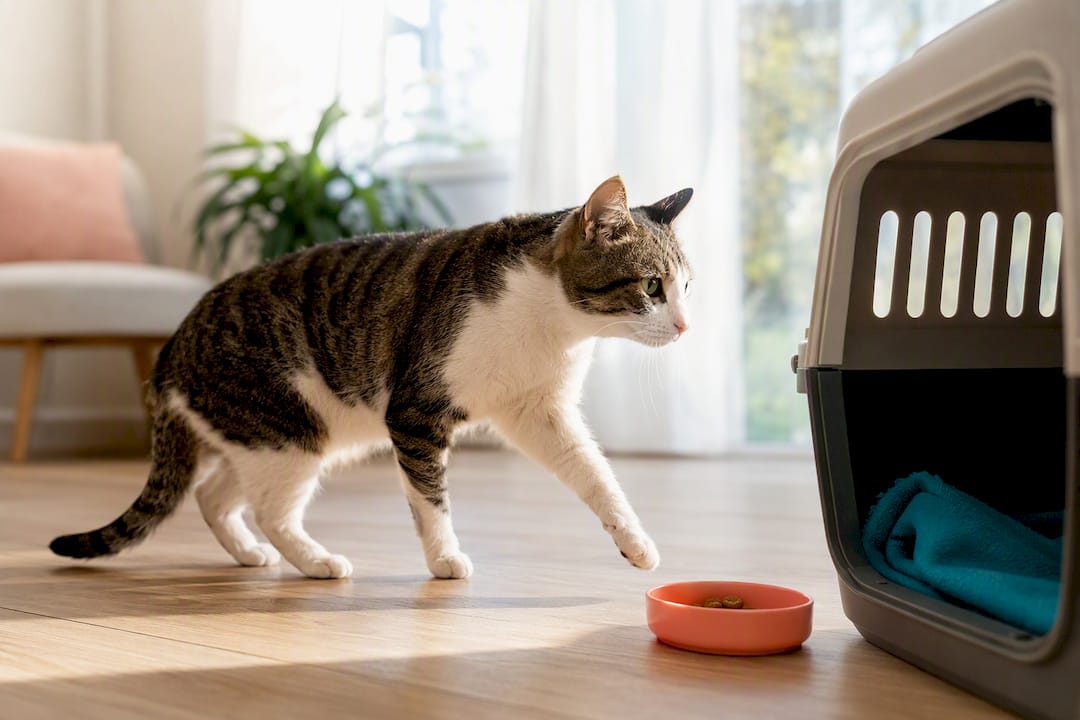
You can teach most cats to accept a carrier using slow desensitisation, food rewards, and short practice lifts, building the carrier into a familiar part of home life rather than something that only appears before a vet trip. The towel wrap method works as a short-term emergency fallback, but it is not a substitute for training. Give it days to weeks, go at your cat’s pace, and treat every small step forward as real progress.
TL;DR:
- Proper carrier size should allow your cat to lie down, stand, and turn comfortably without feeling trapped or unstable, which is critical for successful training.
- Making the carrier a permanent part of the home with familiar bedding and gradual positive associations significantly reduces stress during travel.
- Training involves short, consistent sessions that gradually increase tolerance, with a focus on rewarding progress rather than rushing through steps.
- Emergency techniques like backwards entry and towel wraps are useful only in urgent situations, not as everyday solutions.
- Securing the carrier properly in the car and preparing supplies like bedding, treats, and paperwork ensure safer, calmer travels and easier future trips.
Table of Contents
- Choosing the right carrier for cat carrier training
- Make the carrier part of your cat’s home
- How do you train a cat to enter a carrier step by step?
- Handling nervous cats and emergency entry techniques
- Transport and car-safety best practice
- Setting up and caring for the carrier
- Common problems and how to fix them
- Our take on carrier training that actually sticks
- Ready to make carrier training easier at home?
- Sources
- FAQ
Choosing the right carrier for cat carrier training
Your training starts before your cat ever sees the carrier. Get the wrong one and every session afterwards fights against you.
Size matters more than most owners expect. A carrier needs enough room for your cat to lie down, stand, and turn around comfortably, but not so much space that they slide about when the car brakes or corners. Too tight feels like a trap; too loose feels unstable, and both undermine the sense of safety you’re trying to build.
The opening style makes the biggest practical difference during training itself. Charity guidance recommends sturdy plastic carriers with removable tops and secure latches, because a top-loading or removable-lid design lets you lower a nervous cat in gently rather than posting them through a small front door. Top-opening carriers are repeatedly recommended by cat welfare organisations precisely because they make the lower-and-place technique possible, which is far less stressful than a frontal approach.
Material and security come next. Sturdy plastic or metal-framed carriers hold up better than cardboard, which softens with damp noses, spilled water, or the odd accident, and can buckle under a wriggling cat. Check that the latches are secure enough to survive a determined shoulder barge and that ventilation holes run along multiple sides, not just the front.
A quick buying checklist for carriers that make training easier:
- Removable or hinged top for gentle, non-confrontational placement
- Front door plus top opening, ideally both usable independently
- Solid, chew-proof latches that won’t pop open mid-journey
- Ventilation on at least three sides, not just the front grille
- A washable, non-slip base that can hold absorbent bedding
- Size that fits your cat’s stretched-out body length plus turning room
If you’re shopping now, Giddy pets’ cat carriers range covers most of these features across different sizes, which is worth checking before you commit to the first one on the shelf.
Make the carrier part of your cat’s home
The single biggest mistake owners make is keeping the carrier in the loft and only bringing it out on vet-trip mornings. By then, its appearance alone predicts something unpleasant, and no amount of coaxing in the moment will undo that association quickly.
Rescue charities emphasise making the carrier part of everyday life rather than a vet-only object, and that principle underpins everything else in this guide. Here’s how to build it in gradually:
- Leave the carrier out permanently, in a room your cat already uses often, with the door propped open and no pressure to interact with it.
- Add familiar bedding, ideally something that already smells like your cat, such as a blanket from their favourite sleeping spot.
- Feed near the carrier first, placing meals or high-value treats just outside the entrance so proximity starts to mean good things.
- Move food gradually inside, over several days, shifting the bowl or treat trail a little deeper each time until your cat is eating with all four paws inside.
- Add a jackpot treat occasionally, dropping something exceptional (a small piece of chicken, a favourite treat) directly into the back of the carrier as a random bonus.
- Watch for stress signals throughout, flattened ears, a swishing tail, crouching, or refusal to eat are all cues to pause and repeat the previous, easier step rather than pushing on.
The Wisconsin Humane Society’s approach to teaching cats to love the carrier follows exactly this pattern: feed inside, then move the food deeper, building a genuinely positive association rather than tolerance. A cat bed or familiar blanket from Giddy pets’ cat beds range can double as carrier bedding here, since the scent transfer does much of the psychological work for you.
How do you train a cat to enter a carrier step by step?
Once your cat is comfortable eating inside an open carrier, you’re ready to move through a structured progression. A stepwise sequence, desensitise, feed inside, replace the top, close the door briefly, then lift and practise moving, is the standard approach endorsed by rescue and welfare organisations, and it works because each stage only asks for a small increase in tolerance.
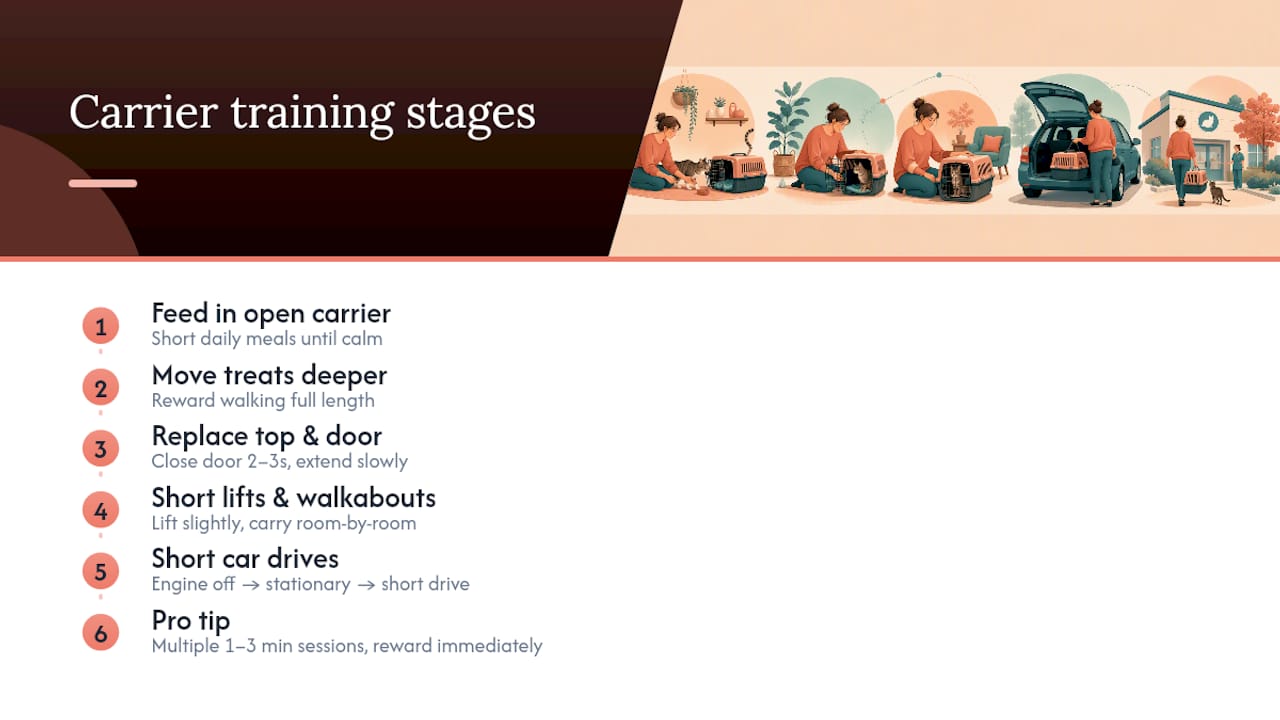
Step 1: Feed in the open carrier, repeatedly. Keep sessions short. Place meals or treats inside the fully open carrier daily until your cat walks in without hesitation and settles for a few seconds before eating.
Step 2: Move treats deeper until they go all the way in. Once your cat enters confidently, start dropping treats progressively further towards the back wall. The goal is a cat who walks the full length of the carrier voluntarily, turns around, and looks relaxed doing it.
Step 3: Reintroduce the top and door gradually. Put the lid back on (still open) so your cat gets used to its presence. Then start closing the door for two or three seconds while they eat, opening it again before they react, and slowly stretching that duration over several sessions.
Step 4: Practise short lifts and carried walkabouts. With the door closed briefly, lift the carrier a few centimetres off the ground, then set it down and reward calmness immediately. Build up to carrying it around one room, then through the house, always ending with a treat and an open door.
Step 5: Add short drives, building up gradually. Once indoor carrying feels normal, move to the car. Start with the engine off, then a stationary engine, then a drive round the block. Veterinary sources recommend the same gradual approach for adult cats as for kittens, increasing journey time only once your cat exits calmly and settles quickly afterwards.
Pro Tip: Very short, frequent sessions beat one long one. A cat that gets multiple one to three minute sessions with an immediate reward tends to progress faster than a cat pushed through a single ten-minute ordeal, because anxiety never has time to build past the point of no return.
Expect this whole progression to take anywhere from a few days for a naturally confident cat to several weeks for a nervous one. Skipping steps to save time almost always costs you more time later, when you have to backtrack from a spooked cat who now associates the carrier with panic again.
Handling nervous cats and emergency entry techniques
Sometimes there’s no time for gradual training, an injured cat, a sudden vet emergency, a cat who has bolted under the bed five minutes before your appointment. For those moments, two techniques help without turning the experience into a wrestling match.
Backwards entry works best with top-opening or front-and-top carriers. Instead of pushing your cat’s head towards the opening (which triggers instinctive resistance), guide their back end in first. Cats struggle far less against this direction because it doesn’t feel like being posted into a hole face-first.
The towel wrap, or burrito method, is the recognised emergency fallback:
- Lay a large, thick towel flat and have the carrier open and ready beside you.
- Approach calmly, speaking in a low, steady voice.
- In one smooth motion, drape the towel over your cat’s body, wrapping it snugly enough to limit flailing without restricting breathing.
- Scoop the wrapped cat, supporting their body weight, and place them directly into the open carrier, towel and all.
- Close the carrier door immediately and step back to let them settle.
Veterinary guidance from the PDSA recommends this towel technique specifically because it’s gentler than forcing a struggling cat in head-first, and it protects both you and your cat from scratches during a panic.
Use these methods only for genuine emergencies, not as your everyday loading strategy. Afterwards, keep your voice low, dim harsh lights if possible, and avoid opening the carrier again until you’ve reached the vet or a calm environment.
Transport and car-safety best practice
Getting your cat into the carrier is only half the job. What happens in the car afterwards decides whether the next trip is easier or harder.
- Secure the carrier on the floor behind a seat, or seatbelted flat on the back seat, never on a lap or loose on a seat where it can slide or tip.
- Never let a cat roam loose in the vehicle; a frightened cat under the pedals is a genuine driving hazard as well as a welfare one.
- Keep the car at a comfortable temperature and crack a window slightly for airflow without a direct draught on the carrier.
- Covering three sides of the carrier with a light cloth reduces visual stimulation and often calms a cat who reacts to passing scenery.
- Start with the engine running but stationary, then a five-minute drive, then gradually longer trips, always ending on a calm exit and a reward.
- Pack an absorbent liner, a spare blanket, a few treats, vaccination paperwork, and your vet’s contact number before any real journey.
Building up mileage slowly matters more than most owners realise. A cat who copes with a two-minute drive around the block at week one might genuinely struggle with a forty-minute motorway trip sprung on them without warning.
Setting up and caring for the carrier
A carrier that smells wrong or feels uncomfortable undoes weeks of training in a single trip, so upkeep matters as much as the training itself.
- Line the base with soft, washable bedding, and add an absorbent layer underneath in case of accidents during stressful journeys.
- Pheromone sprays can help settle anxious cats when timed correctly, sprayed roughly 15 minutes before travel so the alcohol carrier has time to evaporate.
- After any soiling incident, strip the bedding, wipe down the interior with a pet-safe cleaner, and let it air dry fully before the next use; removable-lid carriers make this far easier than fixed designs.
- Check latches, ventilation gaps, and interior edges for wear before every trip, a cracked latch or a sharp broken clip can turn a calm journey into a dangerous one.
A calming spray from Giddy pets’ pet calming sprays and diffusers range, paired with soft bedding from the cat beds range, covers most of this setup in two products.
Common problems and how to fix them
Training rarely runs in a straight line, and most setbacks trace back to moving one step too fast.
- Cat freezes at the entrance: go back a stage and rehearse reward-based entry with the door fully open until confidence returns.
- Door noise triggers fear: tape the door open and desensitise to the click or clatter separately, at a distance, while your cat eats high-value treats, then gradually bring the sound closer.
- Cat resists being lifted: practise tiny, centimetre-high lifts and reward calmness the instant you set the carrier back down, before attempting any real height or distance.
- Progress stalls entirely: for deeper handling anxiety, fear-free handling techniques offer a broader toolkit worth exploring alongside carrier-specific work.
Pro Tip: If your cat shows sudden, severe carrier phobia that wasn’t there before, rule out pain first. A cat with arthritis or an injury can suddenly panic at being lifted or confined, and that’s a vet conversation, not a training problem.
Persistent, extreme fear that doesn’t shift after several weeks of consistent, gentle practice is a sign to bring in a qualified behaviourist or speak to your vet, rather than pushing through alone.
Our take on carrier training that actually sticks
Most advice on cat carrier training treats it as a one-off project you complete before a single vet visit. That’s backwards. The cats who cope best with carriers are the ones whose owners left the thing out permanently, fed treats in it on a random Tuesday with no trip planned, and never let it become a once-a-year object of dread.
We’d also push back gently on the idea that speed is the goal. Owners often want a “how fast can I fix this” answer, but the research on session length is clear: short, frequent, low-pressure practice beats a single marathon effort every time. A cat who gets three one-minute sessions a week for a month is usually calmer than one dragged through a single stressful hour.
The carriers, bedding, and calming aids recommended support this slower, kinder approach, and a free welcome kit with further pet-care guides can help build good habits beyond the carrier itself.
— Giddy
Ready to make carrier training easier at home?
A well-chosen carrier does half the work before training even starts, and The cat carriers range includes products with removable-top, secure-latch features commonly recommended by charity guidance. Alongside the carrier itself, soft bedding and calming sprays make a real difference to how quickly a nervous cat settles into the new routine.

Delivery across the UK is quick, and returns follow the standard process if a size or style doesn’t suit your cat once it arrives. There’s no pressure here, just a straightforward range picked with training in mind rather than looks alone. If you’re starting from scratch, browse the cat carriers collection today and pick the size and opening style that matches the steps above, or explore the wider shop by category page if you need bedding, calming aids, and travel accessories in one order.
Sources
- How to get your cat in a carrier — PDSA
- How to choose and use a cat carrier — Cats Protection
- Travelling with your cat — International Cat Care
- How to train your cat to enter a carrier — Woodgreen
FAQ
What is the 3-3-3 rule for cats?
The 3-3-3 rule is general adjustment guidance for newly adopted cats, three days to decompress, three weeks to settle into routine, three months to feel fully at home, rather than a carrier-specific method, though the same patience applies well to carrier training.
How do I put an unwilling cat into a carrier?
Try backwards (bum-first) entry through a top-opening carrier first, and if your cat is genuinely distressed or you’re facing a time-pressured emergency, use the towel wrap method rather than forcing them in head-first.
Do vets recommend cat slings?
Cat slings aren’t standard veterinary or charity guidance for carrier training; the recommended approach remains a proper sturdy carrier with a secure, ventilated design, alongside gradual desensitisation.
How can I train my cat to be carried calmly?
Build up gradually through short indoor lifts before attempting any car journey, rewarding calm behaviour immediately after each lift, and only progressing to longer carries once your cat settles quickly and shows no stress signals.
How long does cat carrier training usually take?
It varies by cat, some adjust within days, while nervous cats can take several weeks of short, frequent sessions; consistency and short session lengths matter more than how quickly you push through the steps.