







30 second ear check: Vet approved UK method for safe dog ear cleaning
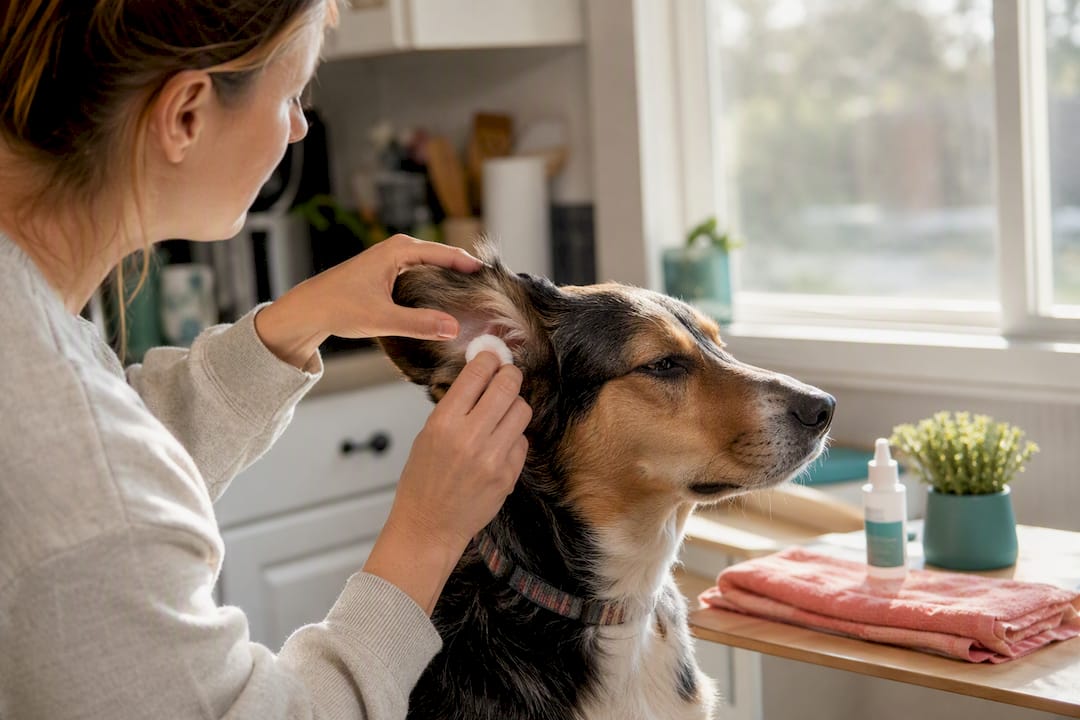
30 second ear check: Vet approved UK method for safe dog ear cleaning
Only clean your dog’s ears when there’s a genuine need to, or when your vet has told you to. The single rule that matters most: use a veterinary-approved ear cleaner, never household products, and stop straight away if you spot signs of infection. If the ears are painful, unusually smelly, bleeding, or producing discharge, see a vet before you touch a cotton ball.
TL;DR:
- Dogs with floppy ears, hairy canals, or those that swim regularly need more frequent checks and cleaning, often weekly or as recommended by a vet.
- Use only veterinary-approved ear cleaners and avoid household products like alcohol or hydrogen peroxide, which can cause irritation or damage.
- Proper technique involves filling the ear canal with cleaner, massaging the base, and wiping away debris without inserting cotton buds or going too deep.
- Regular visual and olfactory checks during grooming help catch issues early, especially for at-risk breeds prone to infections or chronic problems.
- Stress reduction methods and behavioral gradual training are crucial for nervous dogs, and proper supplies like calming treats and dog wipes make the process easier.
Table of Contents
- Can you safely clean a dog’s ears at home?
- How often should you clean your dog’s ears?
- What to use — and what to never put near your dog’s ears
- The step-by-step method vets actually recommend
- Making ear care stress-free for a nervous dog
- Breed and lifestyle considerations
- Giddy Pets resources and vet-approved support
- Our take on at-home ear care
- Getting the right supplies without the guesswork
- Sources
Can you safely clean a dog’s ears at home?
Yes, for most healthy dogs, but only when it’s actually needed. A healthy ear is pale pink inside, free of strong odour, and shows no swelling or heat. That’s the baseline you’re checking against every time, and according to Cornell University’s veterinary guidance, some dogs never need routine cleaning at all while others need regular maintenance because they’re prone to infections.
The trouble starts when owners clean out of habit rather than necessity. Over-cleaning strips the ear’s natural protective wax and irritates the delicate skin of the canal, which can actually invite the infections you’re trying to prevent.
Watch for these before you reach for a cleaner:
- Pain when the ear is touched or the head is turned
- Swelling, heat, or visible redness inside the canal
- A strong, often yeasty smell
- Thick discharge, whether pale, brown, or black
Any of those means a vet visit, not a home clean.
How often should you clean your dog’s ears?
There’s no single fixed schedule, because frequency depends on your dog’s ears, not the calendar. Breeds with floppy, low-hanging ears (think Cocker Spaniels or Basset Hounds) trap moisture and warmth, which bacteria and yeast love. Dogs with hairy ear canals, keen swimmers, and dogs with allergies all sit higher up the risk scale too.
Think of it as a spectrum rather than a rule:
- Low risk, upright-eared dogs: clean only when visibly dirty or waxy
- Higher risk breeds or regular swimmers: weekly checks, cleaning as needed
- Therapeutic cleaning under vet instruction: sometimes daily for a short course, usually to help medicated drops reach infected skin properly
Whatever category your dog falls into, fold a quick ear check into your normal grooming routine. A glance and a sniff take seconds and catch problems long before they become emergencies.
What to use — and what to never put near your dog’s ears
Stick to a veterinary-approved dog ear cleaner formulated for canine ear canals. That’s the only product category that belongs anywhere near this job. Alcohol and hydrogen peroxide are both off the table: they sting, irritate already sensitive tissue, and can actively damage the ear canal rather than clean it.
Before you start, gather:
- Vet-approved ear cleaning solution
- Cotton balls or gauze (never cotton buds)
- A towel, because shakes happen
- Treats to keep the mood light
- An assistant, if your dog wriggles
Cotton buds are genuinely dangerous here. Cornell’s guidance is blunt about it: pushing one into the canal risks puncturing the eardrum or shoving debris deeper rather than removing it. The same goes for pouring in home remedies you’ve read about online. If it’s not made for a dog’s ear canal, it doesn’t go in.
The step-by-step method vets actually recommend
Getting the technique right matters more than the product you’ve bought. Follow this sequence and you’ll avoid the two most common mistakes: going in too deep, and stopping before the solution has actually done its job.
- Settle your dog first. Choose a calm moment, not straight after a walk or a play session. Let your dog sniff the bottle before you start, so it isn’t a surprise object suddenly appearing near their head.
- Fill the canal. Squeeze the cleaner into the ear canal without letting the bottle tip touch the ear. You want enough solution that the canal is properly filled, not just a token squirt.
- Massage the base. Gently massage the base of the ear for 20 to 30 seconds. You’re listening for a squelching sound, which tells you the solution is reaching the horizontal canal and loosening debris as intended.
- Let them shake. Step back and let your dog shake their head. This does most of the physical work of bringing debris up and out.
- Wipe, but only so far. Use a cotton ball or gauze to wipe away what’s now visible, going no deeper than the depth of one knuckle. The canal curves, and the eardrum sits further in than most owners assume.
Pro Tip: If you can’t hear that squish when you massage, you probably haven’t used enough cleaner. Add a little more rather than pushing harder or digging deeper with the cotton.
Stop immediately and call your vet if your dog yelps in pain, if you see fresh blood, or if the ear looks worse after cleaning rather than better.
Making ear care stress-free for a nervous dog
Dogs that dread ear cleaning usually got that way through one bad, rushed experience rather than the process itself. Building tolerance takes patience, but it pays off for years.
Behavioural guidance from Dogs Trust recommends breaking the process into small, repeatable steps rather than attempting the full routine on day one:
- Touch the ear briefly, reward, and stop
- Progress to lifting the ear flap, reward, stop
- Hold the ear open for a few seconds without any product, reward
- Introduce the empty bottle near the ear before you ever use it for real
- Only then attempt an actual clean, kept short and calm
Calming treats or an anxiety wrap can take the edge off for particularly nervous dogs during these early sessions. If your dog becomes genuinely distressed at any stage, or shows signs of fear aggression, pause and speak to your vet or a qualified behaviourist rather than pushing through.
Breed and lifestyle considerations
Ear shape and lifestyle change the maths on risk considerably. Floppy-eared breeds trap warm, moist air against the skin, which is exactly the environment yeast and bacteria thrive in, so these dogs need closer, more frequent monitoring than prick-eared breeds.
Dogs that swim regularly need their ears dried thoroughly afterwards, and a vet-recommended drying solution can help where towel-drying alone isn’t cutting it. Chronic issues, meanwhile, such as recurring infections, allergies, or ear mites, are not a home-cleaning problem. They need proper veterinary diagnosis, because the underlying cause has to be treated, not just the symptom wiped away.
Giddy Pets resources and vet-approved support
Getting the right supplies together shouldn’t be the hard part of this. Giddy Pets stocks a curated range of dog ear cleaners selected specifically for safety and reviewed against veterinary guidance, rather than picked for shelf appeal.
A sensible starter kit for a first cleaning session looks like this:
- A vet-approved ear cleaning solution
- Soft dog wipes for cleaning the outer ridges once your dog has finished shaking
- A calming treat on hand to keep the whole experience low-stress
None of this replaces a vet when something’s genuinely wrong. Think of these as the tools that make the routine, low-risk cleans easier and calmer, not a substitute for diagnosis when an ear looks or smells off.
Our take on at-home ear care
The advice on dog ear cleaning has a habit of splitting into two unhelpful camps: owners told to clean weekly regardless of need, and owners so worried about doing it wrong that they avoid it entirely until there’s a problem. Neither serves the dog well. The evidence points somewhere more sensible in the middle: clean when there’s a reason to, using the right product and the one-knuckle rule, and otherwise leave well alone.
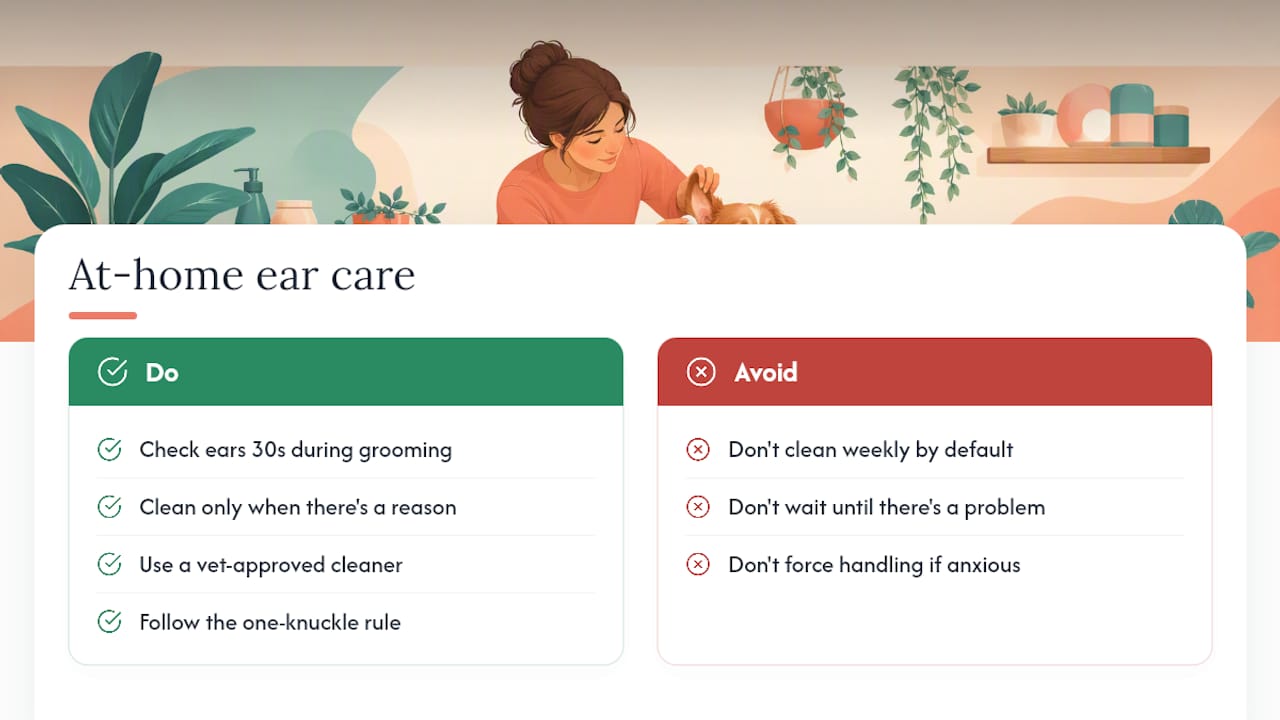
Where conventional advice tends to fall short is on the behavioural side. Plenty of guides hand you the clinical technique and stop there, as if a squirming, anxious dog will simply tolerate a bottle appearing near its head because the massage technique is correct. It won’t. Getting a dog comfortable with ear handling matters just as much as knowing where the horizontal canal sits.
If you take one thing from this, prioritise the checks over the cleaning. A thirty-second glance and sniff during your normal grooming routine will catch far more problems, far earlier, than any fixed cleaning schedule ever will.
— Giddy
Getting the right supplies without the guesswork
Once you know your dog needs a clean, the last thing you want is to be comparing a dozen bottles trying to work out which one is actually vet-approved. Giddy Pets curates its ear cleaning range specifically so every product on the page has already cleared that bar, with fast UK delivery so you’re not waiting around once you’ve spotted an issue.

Pairing a proper cleaner with the right supporting kit makes the whole process smoother. A set of soft dog wipes handles the outer ridges after your dog shakes, and calming treats turn a tense first session into a manageable one, particularly for dogs who flinch at handling near the head. For dogs who need more support settling into grooming generally, a calming anxiety wrap is worth adding to the kit.
Browse the pet health and grooming range to put together your own routine, and if what you’re seeing in the ear looks anything like the red flags covered above, book a vet visit before reaching for any bottle.
Sources
- How to clean your dog’s ears | Cornell University College of Veterinary Medicine
- How to clean a dog’s ears safely | AKC