






Prevent ear infections: Cocker Spaniel grooming schedule for owners
Prevent ear infections: Cocker Spaniel grooming schedule for owners
Cocker Spaniels need daily quick checks, two to three full brush sessions a week, and a professional groom every several weeks. The single most important habit is drying the ears and feathering completely after any wet walk, paired with a weekly ear check, since this breed’s floppy ears trap moisture and invite infection faster than almost any other. Adjust frequency for coat length and lifestyle, but never skip the ears.
TL;DR:
- Regular home grooming should focus on weekly brushing of feathering and frequent ear checks to prevent infections, especially after wet walks.
- Bathing should be limited to every four to six weeks, avoiding over-washing that can cause coat and skin issues.
- Professional grooming every six to eight weeks maintains coat health, with timing adjusted based on activity level, coat type, and lifestyle.
- Essential tools include a fine slicker brush, stainless-steel comb, and dog-specific shampoo; quality over quantity is key.
- Short, consistent grooming sessions starting early with positive reinforcement encourage cooperative behavior and prevent matting.
Table of Contents
- How often to groom a Cocker Spaniel: frequency and a practical calendar
- Home care routine: step-by-step grooming workflow
- Essential tools and products: how to choose them
- Bathing and drying: techniques that protect the coat
- Clipping, scissoring, or hand-stripping: which method and when
- Preventing and removing mats: safe dematting practices
- Ear and eye care: checks, cleaning, and infection prevention
- Nail and paw care: trims, pad hair, and seasonal hazards
- Grooming puppies and training them to enjoy it
- When to see a professional groomer and what to expect
- Giddy Pets recommended toolkit and vet-backed buying tips
- Grooming as preventative care, not just appearance
- Building your Cocker Spaniel grooming kit with Giddy Pets
- Sources
How often to groom a Cocker Spaniel: frequency and a practical calendar
Cocker Spaniel grooming isn’t a once-a-month event you can batch into a single Sunday session. It’s a layered routine, with different tasks running on different clocks, and the dogs that stay mat-free and infection-free are almost always the ones whose owners treat grooming as a habit rather than a rescue mission.
Daily (2 minutes):
- Check ears for odour, redness, or discharge.
- Glance over eyes for discharge or redness.
- Run a hand through the “feathering” (the longer fringe on ears, legs, chest, and belly) to feel for early tangles.
- Wipe paws and belly with a damp cloth after muddy walks.
Two to three times a week (10 to 15 minutes):
- A full brush-through with a slicker brush, followed by a comb-check to the skin. This is the routine that actually prevents mats, rather than just tidying the surface.
- Extra attention behind the ears, under the “armpits,” and around the collar, where friction builds tangles fastest.
Every four to six weeks:
- A full bath and blow-dry, using a dog-specific shampoo.
- Avoid bathing more often than this unless your dog has rolled in something unspeakable or been swimming somewhere unsanitary. Frequent washing strips the natural oils that keep the coat weatherproof and skin balanced, which is one of the quiet grooming mistakes that causes the chronic skin and coat issues many owners wrongly blame on the breed itself rather than the routine.
Every six to eight weeks:
- A full professional groom: clip or scissor maintenance, ear clean, nail trim, and a trained eye checking for anything you might have missed at home.
Most Cocker Spaniels do well on this professional grooming interval (https://groomica.eu/blogs/grooming-guides/cocker-spaniel-grooming-care-guide), though working dogs with shorter, practical trims can sometimes stretch slightly longer, while show-coated or very active dogs that pick up debris constantly may need it closer to six weeks. A dog that swims regularly, lives mostly outdoors, or has particularly profuse feathering will sit at the more frequent end of every scale above. A short-coated pet trim on a mostly indoor dog can sit at the longer end. The calendar is a starting point, not a rulebook.
Home care routine: step-by-step grooming workflow
A good home grooming session has a rhythm to it, and once you and your dog know that rhythm, the whole process gets faster and calmer for both of you.
- Set up before you start. Choose a calm space with a non-slip surface (a bath mat on a table or floor works well), lay out your tools within reach, and have a few small treats ready. Rushing to find the comb halfway through is how sessions turn stressful.
- Brush in sections, not all at once. Work through one area at a time: one ear, then the other, then the chest, then each leg, then the belly. Trying to brush the whole dog in sweeping strokes misses far more than it catches.
- Slicker first, then comb. Use the slicker brush to lift the coat and clear loose hair, then follow immediately with a stainless-steel comb pulled right down to the skin. This two-step sequence is the recommended standard for Cocker Spaniel coats because a brush alone can glide over the top of a mat that’s forming underneath, leaving it to tighten unnoticed. The comb is your proof that a section is genuinely clear.
- Give extra time to the high-risk zones. Ears, behind the elbows, the underarms, the chest, the belly, and the paw feathering mat faster than anywhere else on the body because that’s where fur rubs against fur, or against a harness, with every step.
- Check eyes, pads, and sanitary areas. Wipe any eye discharge with a damp cotton pad. Look between the paw pads for trapped debris or matted hair. Trim excess hair around the sanitary area with round-tipped scissors, working slowly and only if your dog is settled.
- Reward and finish. End on something calm and positive, even if the session wasn’t perfect. Cocker Spaniels respond to routine, and a session that ends well makes the next one easier.
Small tidy-up trims at home are perfectly reasonable: neatening the hair around the eyes so it doesn’t obscure vision, trimming pad hair so it doesn’t ball up with mud, or a light sanitary trim. Where owners get into trouble is attempting body-wide clipping without training. It’s easy to nick skin with scissors angled the wrong way, or to take far more coat off than intended with clippers on the wrong guard length. If in doubt, tidy the small stuff and leave the rest to your six-to-eight-week groom.
Pro Tip: Keep a small notebook or phone note of anything unusual you find during brushing, a lump, a sore patch, a stubborn mat in the same spot every time. Patterns you notice over weeks are exactly the kind of detail a vet or groomer finds useful, and you’ll spot them faster than anyone else because you’re the one running your hands over your dog several times a week.
Essential tools and products: how to choose them
You don’t need a cupboard full of gadgets. You need a handful of good tools, used properly and often, and the difference between a well-chosen kit and a random collection of pet shop impulse buys shows up fast in how the coat actually behaves.
The core brushing kit:
- A slicker brush with fine, slightly bent wire bristles, for lifting loose hair and opening up the coat before combing.
- A stainless-steel comb with both wide and narrow tooth sections, for the skin-level check that catches what the brush misses.
- A pin brush for gentler, everyday smoothing on dogs with softer coats.
- A deshedding rake for the undercoat during heavier shedding periods.
- Small blunt-tipped scissors for face and paw tidying, and clippers if you plan to do trims beyond basic tidy-ups.
The wider grooming kit:
- A gentle, dog-specific shampoo and conditioner.
- A vet-approved ear cleaner and cotton pads (never cotton buds pushed into the canal).
- A detangling spray for working through feathering without pulling.
- Nail clippers or a grinder, whichever your dog tolerates better.
- An absorbent towel and a low-heat dryer.
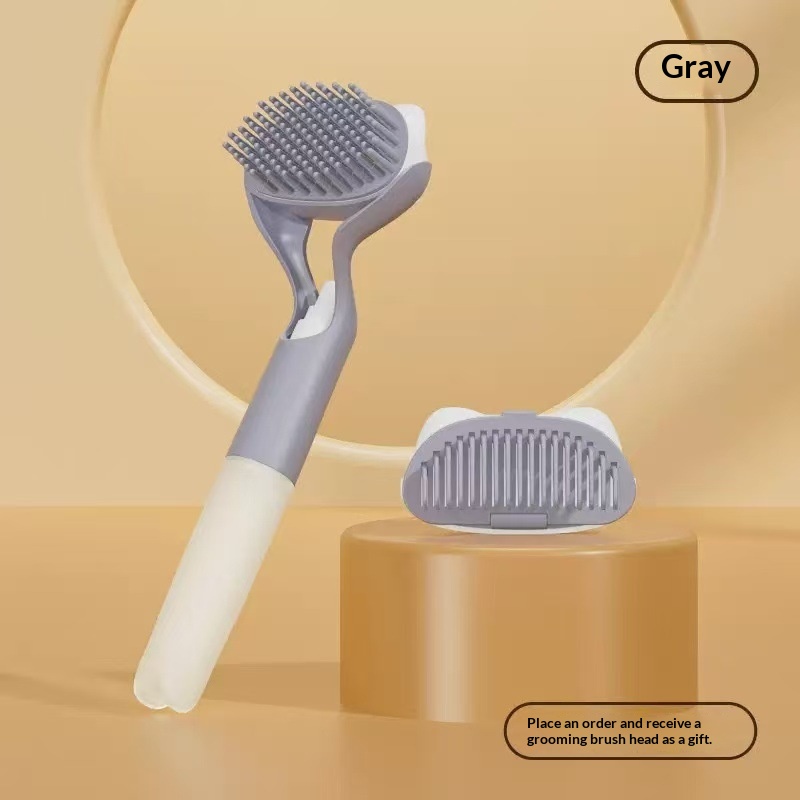
The gentle slicker brush paired with a stainless-steel comb is consistently the combination that handles feathering best and catches the hidden tangles a single tool misses. When you’re choosing, look for rounded, slightly flexible pin tips on brushes (sharp or overly stiff pins can scratch skin), a comb with genuinely stainless teeth spaced closely enough to catch fine undercoat, and, if buying clippers, a motor with enough power to move smoothly through thick feathering rather than snagging and stalling. Cheap clippers that overheat or pull hair are a false economy; you’ll end up with a stressed dog and a patchy result.
Read shampoo and conditioner labels the same way you’d check food ingredients: look for products designed for sensitive skin, free from harsh sulphates, and ideally recommended for the coat type you’re dealing with. If your budget is tight, spend it on one genuinely good slicker brush and one good comb rather than five mediocre tools. Giddy Pets stocks dog grooming brushes suited to this exact combination, and grooming gloves for owners whose dogs find traditional brushes a bit much.
Bathing and drying: techniques that protect the coat
Bath time is where a lot of well-meaning grooming goes slightly wrong, usually not because owners bathe too rarely, but because they bathe too often, or dry too little.
When to bathe: stick to regular bathing intervals unless your dog has genuinely got into something dirty or swum somewhere questionable. Over-washing strips the coat’s natural oils, which leaves skin drier and, counter-intuitively, makes matting worse rather than better.
Shampooing technique:
- Wet the coat thoroughly right through to the skin. A quick surface splash won’t cut it on a double coat.
- Use a small amount of dog-specific shampoo, working it in with your fingertips rather than nails.
- Pay attention to the feathering, chest, and underbelly, where dirt and oils build up fastest.
- Rinse until the water runs completely clear. Leftover shampoo residue is a common, avoidable cause of itchy skin.
Conditioner and detangling products: apply a lightweight conditioner or leave-in detangler specifically to the feathering on ears, legs, and belly, where the coat is longest and most prone to friction. These areas benefit far more from conditioning than the shorter body coat does.
Drying properly: towel off the excess water first, then finish with a low-heat blow-dryer while brushing through the coat as it dries. Drying with a dryer while actively brushing is genuinely essential here, not optional. Towel-drying or air-drying alone tends to let the coat clump and dry into knots, particularly around the ears, which then need far more work to remove than they would have if brushed out while damp.

Pro Tip: Never let your dog air-dry with wet ears and leave it at that. Damp, warm, dark ear canals are close to ideal conditions for the yeast and bacteria that cause ear infections, so a thorough dry of the ear flaps and canal opening after every bath and every wet walk matters just as much as the brushing itself.
Clipping, scissoring, or hand-stripping: which method and when
These three methods get lumped together as “grooming” in most conversations, but they do genuinely different jobs, and picking the wrong one for the wrong reason is where a lot of coat problems start.
Clipping uses electric clippers to cut hair quickly and evenly, and it’s the fastest route to a tidy, manageable pet trim. The trade-off is that repeated clipping over time can alter coat texture, sometimes making it softer or more prone to matting, and it removes length unevenly across the natural lie of the coat compared with scissoring. For most pet Cocker Spaniels having a practical, low-maintenance trim, conservative clipping is entirely reasonable when done by someone experienced.
Scissoring is slower, more skilled finishing work, shaping the coat and feathering by hand with scissors rather than a clipper guard. It preserves the natural coat line better and gives a groomer far more control over shape, which is why most professional Cocker Spaniel trims combine a clipped body with scissored legs, ears, and tail.
Hand-stripping removes dead outer coat by hand or with a stripping tool, preserving the harsher, weatherproof texture prized in show and working coats. It’s specialist work requiring real training, and it’s genuinely not something to attempt at home. Done badly, it causes real discomfort.
What’s safe to attempt yourself:
- Tidying paw pad hair so your dog doesn’t slip on hard floors.
- Light sanitary trims around the rear.
- Small trims around the eyes so vision isn’t obscured.
- A light tidy of stray hair on the face.
What to leave to a professional:
- Full body clipping or scissoring.
- Any hand-stripping work.
- Correcting an uneven trim from a previous attempt.
If you’re not confident with clippers near skin, it’s worth booking the professional groom slightly earlier rather than trying to fix a mistake yourself.
Preventing and removing mats: safe dematting practices
Mats form where friction, moisture, and loose undercoat combine, and on a Cocker Spaniel that almost always means the feathering: behind the ears, under the collar, in the armpits, and along the back of the legs. Every step your dog takes, that fur rubs against itself, and every bit of loose undercoat that doesn’t get brushed out becomes another thread in the knot.
Prevention beats treatment every time. Short, regular brushing sessions genuinely outperform occasional long ones, because a mat that’s caught at the “slightly tangled” stage takes seconds to comb out, while the same spot left for two weeks can turn into a dense, skin-level knot that’s painful to remove and sometimes impossible to save without clipping. A quick comb-check through the high-risk zones after any wet walk or muddy field catches most problems before they start.
When you do find a mat, work through it carefully:
- Apply a detangling spray to the mat and let it sit for a minute or two.
- Hold the section of coat firmly against the skin with one hand, this reduces the pulling sensation your dog feels.
- Gently tease the mat apart from the outer edges inward, working towards the skin rather than yanking from the root outward.
- Use the comb to test your progress; if it glides through cleanly, you’re done.
- Only cut a mat as a last resort, and if you must, slide a comb underneath it first and cut above the comb, never flush against the skin, where nicking is a real risk.
Pro Tip: Working from the ends of a mat towards the root, rather than pulling straight from the root, dramatically reduces the skin pull your dog feels. It takes longer, but a calm dog who tolerates dematting is worth far more than a fast job that teaches them to dread the brush.
If a mat is already sitting flush against the skin, or your dog flinches and pulls away when you touch the area, stop and book a professional groom. Established or painful mats sometimes need to be clipped short rather than teased apart, and that’s a judgement call better left to someone experienced.
Ear and eye care: checks, cleaning, and infection prevention
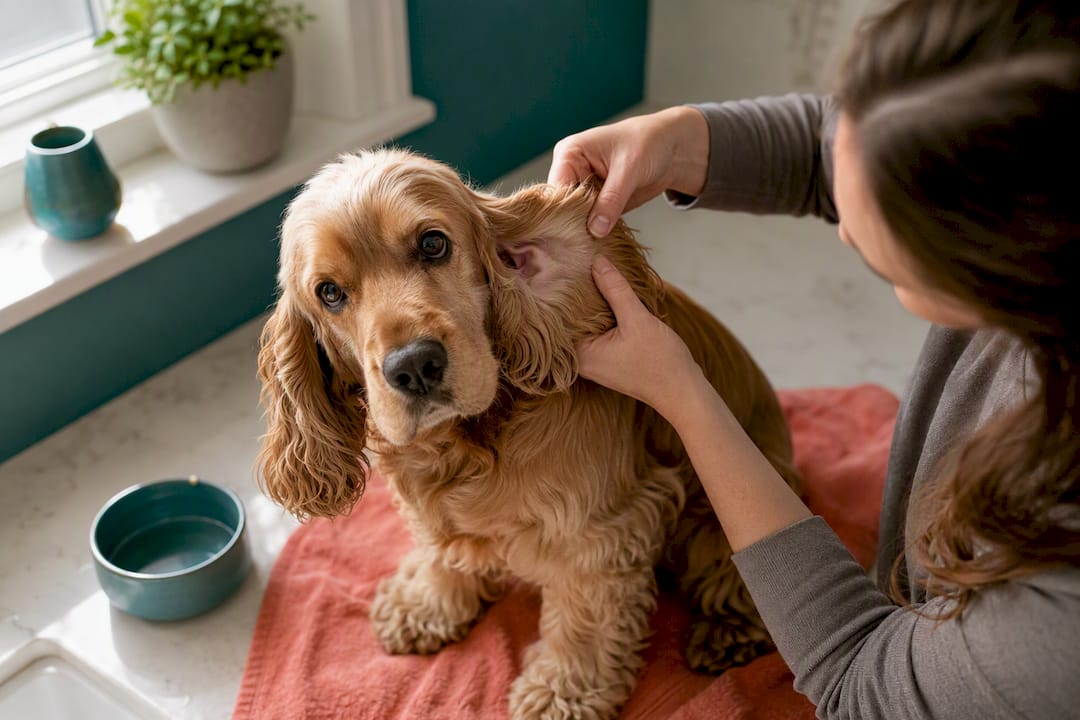
Long, floppy ears look lovely and cause more grooming headaches than any other feature of this breed. They trap warm, moist air against the ear canal, and that environment is exactly what bacteria and yeast thrive in, which is why ear infections rank among the most common health complaints in Cocker Spaniels.
Weekly ear-cleaning routine:
- Apply a vet-approved ear cleaner into the ear canal, following the product’s instructions.
- Gently massage the base of the ear for around 30 seconds to work the solution through.
- Let your dog shake their head, this brings debris up and out.
- Wipe the visible, outer part of the ear with a clean cotton pad.
- Never push a cotton bud down into the canal; it packs debris deeper rather than removing it.
Eye care is simpler but still needs daily attention. Wipe away any discharge with a damp cotton pad, working from the inner corner outward, and check for redness, cloudiness, or excessive watering.
Call your vet if you notice a persistent odour, ongoing redness, heavy or coloured discharge, or your dog scratching at or shaking their head repeatedly. Caught early, most ear irritation resolves quickly with the right treatment. Left alone, it can progress to a painful, chronic infection that’s far harder to clear. Giddy Pets stocks gentle ear cleaning solutions formulated for exactly this weekly routine.
Nail and paw care: trims, pad hair, and seasonal hazards
Nails and paws don’t need daily attention, but they do need consistency, roughly every four to six weeks depending on how much your dog naturally wears them down on hard surfaces.
Trimming technique:
- Trim a small amount at a time, cutting just below where the nail curves, well clear of the pink quick visible on lighter nails.
- If your dog has dark nails where the quick isn’t visible, take off tiny slivers rather than guessing.
- A nail grinder is often better for anxious dogs, since the gradual grinding feels less alarming than the snap of clippers.
Paw pad hair grows between the pads on many Cocker Spaniels and, left untrimmed, traps mud, grass seeds, and moisture while also making hard floors slippery. A light trim with round-tipped scissors, working carefully between the pads, solves both problems.
Seasonal hazards matter more than owners expect. Grass seeds can work their way between pads or into ears during summer walks through long grass, and they migrate inward surprisingly fast. Check paws and ears after every walk through fields or long grass, and if you spot swelling, limping, or a seed you can’t remove easily, get to a vet promptly rather than waiting. Giddy Pets carries nail clippers and grinders suited to nervous and confident dogs alike.
Grooming puppies and training them to enjoy it
The grooming habits your puppy learns in the first few months shape how easy, or difficult, every session is for the next decade.
- Start young, keep it brief. Sessions of two or three minutes, ending on something positive, teach a puppy that grooming is nothing to fear.
- Introduce tools gradually. Let your puppy sniff the brush first, then touch it lightly to their coat without brushing, then do a few gentle strokes. Reward calmly after every single step, not just at the end.
- Keep early trims minimal. Nail tips and a light face tidy are plenty for a young puppy. Save fuller trims until they’re comfortable being handled.
- Book an early introductory groom. Many groomers offer a settling-in session for puppies, just handling and a light brush, so the salon environment feels familiar before any real trimming starts.
- Keep notes. Jot down how your puppy tolerated each new tool and anything unusual on their skin. This record becomes genuinely useful later if a groomer or vet asks how long a particular sensitivity has been present.
If your puppy seems tense or resistant, don’t push through it. A calm, short session repeated often builds more trust than one long session that ends badly.
When to see a professional groomer and what to expect
Book a professional groom when you’re dealing with established mats you can’t safely remove yourself, recurring ear issues that need an experienced eye, or scissor work beyond simple tidying.
A typical full salon service includes a pre-groom assessment of coat and skin condition, a bath and blow-dry, clip or scissor finishing, an ear clean, and a nail trim, all in one visit. Consistent scheduling at this six-to-eight-week interval actually reduces the amount of remedial work needed at each visit, because the groomer is maintaining a coat rather than rescuing one.
Before your appointment:
- Mention any medical notes, skin sensitivities, or recent vet visits.
- Describe your dog’s temperament honestly, groomers plan sessions differently for a nervous dog versus a relaxed one.
- Be specific about the clip length you want; “short” means very different things to different owners.
Working Cocker Spaniels with practical, functional trims sometimes stretch the interval slightly longer, while companion dogs with fuller show-style coats tend to sit at the shorter end of that six-to-eight-week window.
Giddy Pets recommended toolkit and vet-backed buying tips
Building an effective home kit doesn’t need to be complicated. Giddy Pets’ grooming range covers the essentials in one place: brushes and combs for the daily and weekly routine, full grooming kits for owners starting from scratch, gentle ear cleaners, deshedding tools for heavier shedding periods, and nail trimmers for every temperament.
When choosing, prioritise rounded pin tips on brushes, genuinely stainless comb teeth, and ingredient lists on shampoos and cleaners that favour gentle, skin-friendly formulas over anything heavily perfumed. A compact starter kit, one slicker brush, one stainless comb, an ear cleaner, and a nail trimmer, covers most of what a Cocker Spaniel needs between professional grooms.
Grooming as preventative care, not just appearance
Grooming isn’t cosmetic maintenance. It’s how you catch the ear infection, the hidden mat, the sore pad before they become a vet visit. If your dog resists at first, don’t panic, build it gradually, keep sessions short, and it becomes routine faster than you’d expect. If you’re ever unsure, a professional groomer or your vet is worth calling.
— Giddy
Building your Cocker Spaniel grooming kit with Giddy Pets
If you’ve read this far, you already know the tools matter as much as the technique. Giddy Pets is built around exactly this problem: matching the right, vet-approved product to the specific job, rather than leaving you guessing between dozens of near-identical options on a generic pet shop shelf.

Our grooming brushes range covers the slicker-and-comb combination this article recommends throughout, sized and bristled for feathering-heavy coats rather than a generic “one brush fits all dogs” approach. If you’re starting from nothing, the dog grooming kit bundles the core essentials, brush, comb, and nail tools, so you’re not piecing together five separate orders. For skin and ear-sensitive dogs specifically, always check ingredient lists and favour gentle, vet-approved formulas over anything with heavy fragrance.
While you’re setting up your grooming station, it’s worth sorting the practical side of dog ownership too, a puppy waste bag on hand makes post-walk paw checks and clean-up far less fiddly. Browse the grooming kit, pick what suits your dog’s coat, and get your routine started this week rather than after the next mat forces the issue.
Sources
- Cocker Spaniel Grooming Guide: Professional Care, Tools & Routine – GROOMICA
- Cockerspanielguide
- Best Brush for Cocker Spaniel — 2026 Buying Guide | Alleavia Pet Supplies